Quick Start Guide
Getting Started with US Signal OpenCloud.
This QuickStart guide will cover Logging in, Creating an Instance (Virtual Machine), accessing that Instance, stopping and starting an Instance, and Setting up additional Users.
This guide will serve as a quick introduction to some of the main functions of OpenCloud and is meant to get a customer up and running in OpenCloud and assist them with building a first Instance as well as setting up Users and other Accounts if necessary. For clarifying instructions on the features of OpenCloud, please refer to the more specific KBs which address them.
Logging into the Portal
- The USS OpenCloud Portal is the graphical user interface that Customers will use to access and manipulate the OpenCloud Environment.
- Customers can access the OpenCloud Portal by going to the OpenCloud URL at https://opc-us-01.ussignal.cloud. The Customer will use their Domain Admin Username, Password, and Domain to log in first and from there they can set up additional users. The login fields are case sensitive.
-
Browsing to the link above will show them the US Signal OpenCloud login page. The Customer will need to input their specific Username, Password, and their unique Domain ID before logging into the main page. If any of this information has not already been provided, please reach out to a USSignal Contact.
The credentials for the OpenCloud Portal are different from those used to log into the US Signal Customer Portal.
-
Multi-Factor Authentication (MFA) is enabled by default, and all new Users will be prompted to setup a TOTP Provider for Two Factor Authentication upon first login. The supported providers are
Google AuthenticatorandOther TOTP Authenticators. Other TOTP Authenticators should work with most 3rd party authenticator applications that support TOTP codes. - Once logged in, the customer will see their own specific OpenCloud Domain.
Creating an Instance
OpenCloud uses the word “Instance” to refer to any kind of Virtual Machine. Instances are made from the available US Signal Shared Templates and customer uploaded ISOs.
- To create an Instance, click on
Compute>Instances. -
There will be a large blue box labeled
Add Instanceat the top of the screen. The instance creation wizard will appear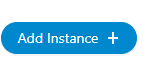
-
Select the Zone where the Instance will live.
Available Zones in OpenCloud
Zone Description us-mi-abh-01 MI05 - Detroit, Michigan us-co-eng-01 CO01 - Denver, Colorado -
Select the Pod, Cluster, and Host if these items are even going to be seen.
- Choose a template or ISO to use to build the Instance. The selection of US Signal Templates can be seen when the
Templatesmenu button is highlighted. If the customer wants to create an Instance from an ISO, they will need to upload the ISO beforehand. - The Instance will have a defined boot disk of 100 GB. On some templates, this root disk can be resized if needed. To resize the disk, the
Override root disk sizeoption can be enabled, and a new frame opens with root disk options. - Select the Compute Offering, or Size, of the Instance can be specified. These Offerings indicate how much CPU and RAM the Instance will be allowed to use. Instances can be resized later if they need more CPU and/or RAM.
- Choose a data disk Volume to be added to the Instance. This is an additional volume that can be added to the Instance. Customers do not have to choose a Data Disk to complete the Instance as additional volumes can be added later.
- Choose what Network the Instance will attach to. Instances in Customer Domains will use Shared Networks and there should already be at least one shared network to use for the Instance NIC.
- After the network is selected, there will be a tab for
Advanced Optionsat the bottom of the screen. Enabling this option allows for additional functions like choosing boot type (BIOS or UEFI), SSH key pairs if needed, affinity groups that allow the joining or separating of Instances on hosts, and user data. None of these options are necessary, but the Template selected for use in building this Instance will have a default boot mode that will be selected automatically under these advanced settings. - The Instance can either be told to boot up immediately after creation or remain in a powered off state. For customers that want to add additional Volumes to their Instances, leaving the Instance in a powered off state may be preferable.
- After the Instance is powered up, it should enter a sysprep mode so that the customer can customize a login and password.
-
Access Instance via Console
- All Instances can be accessed using the OpenCloud Console.
- To get to Console Access, first log in to OpenCloud and then click on
Compute>Instances. - Click on the name of the Instance that needs to be accessed.
-
Once inside the instance, click on the
View Consolebutton.
-
This will allow console access to the Instance. A new window will open to display the Console. Mouse and Keyboard functionality will already exist in the Instance Console.
- This Console button also exists under the name of the Instance itself on the details screen.
Stop and Start an Instance
- Instances need to be in a Stopped state to perform certain tasks such as restoring from a Snapshot or resizing their resources.
- To stop or start an Instance from the OpenCloud main menu, click on
Compute>Instances. - Click on the Instance name in question to enter its details screen.
-
In the upper right side of the screen, click on the button that says
Stop Instance.
-
A dialog box will appear. Click OK to stop the Instance.
- The buttons in the upper right side will change to other options once the Instance is stopped.
-
To start an Instance again, click on the same button, which will have turned into the
Start Instancebutton.
-
The Instance will then start up again and can be accessed via the Console.
Stopping Instances from Guest
Stopping instances should be performed from the OpenCloud UI. If an instance is shutdown from within the OS, the HA (High Avaiabiltiy) process will automatically restart the instance.
Set Up New Accounts
New Accounts can be used to provide access give different roles (permissions) or separate resources into different accounts
- To create new Accounts in OpenCloud, first log in to the main OpenCloud menu.
- Click on
Accounts, which will bring up the main Account Screen. -
Click on
Add Accountat the top of the screen.
-
A dialog box will open to fill out information about the new Account.
- Customers should take care to choose the permissions of the Accounts wisely. Most if not all accounts should be the User role.
- Fill out the following Information:
| Field | Required or Optional |
|---|---|
| Role | Required for Account Creation |
| Username | Required for Account Creation |
| Password | Required for Account Creation |
| Required for Account Creation | |
| First and Last Name | Required for Account Creation |
| Domain | Required for Account Creation |
| Account Name | Optional. Account Name can be the same as the Username |
| TimeZone | Optional. Select the local timezone for the Account |
OpenCloud Terminology
| Term | Description |
|---|---|
| Instance | VMs (Virtual Machines) are called Instances. Note: Older APIs still refer to Instances as Virtual Machines. |
| Volume | One or more disk(s) attached to a user Instance |
| Root Volume | Contains root volume. This is typically the OS. An instance can only have 1 Root Volume |
| Data Volume | Contains additional volumes. An instance can have more then 1 Data Volume. |
| Domain | A collection of resources that has its own set of Accounts. Domains are independent from specific location resources. |
| Account | An Account has its own set of Users. Resources are assigned to Accounts. Permissions are assigned to an Account |
| User | Users are used to log into OpenCloud. They are attached to Accounts. |
| Zone | In OpenCloud a Zone represents a different datacenter. |
| QCOW2 | This is the disk format that OpenCloud uses |